A blog for the team at Project OSCAR, who are creating a repository of Blender models.
Thursday, July 19, 2012
3D Models for Physics Repository with Cycles in Blender
Hey,
In addition to my previous models for Physics, these are few more. Following are the existing models on the OSCAR website, whereas, just below them, is an images showing renders of the same models in Cycles:
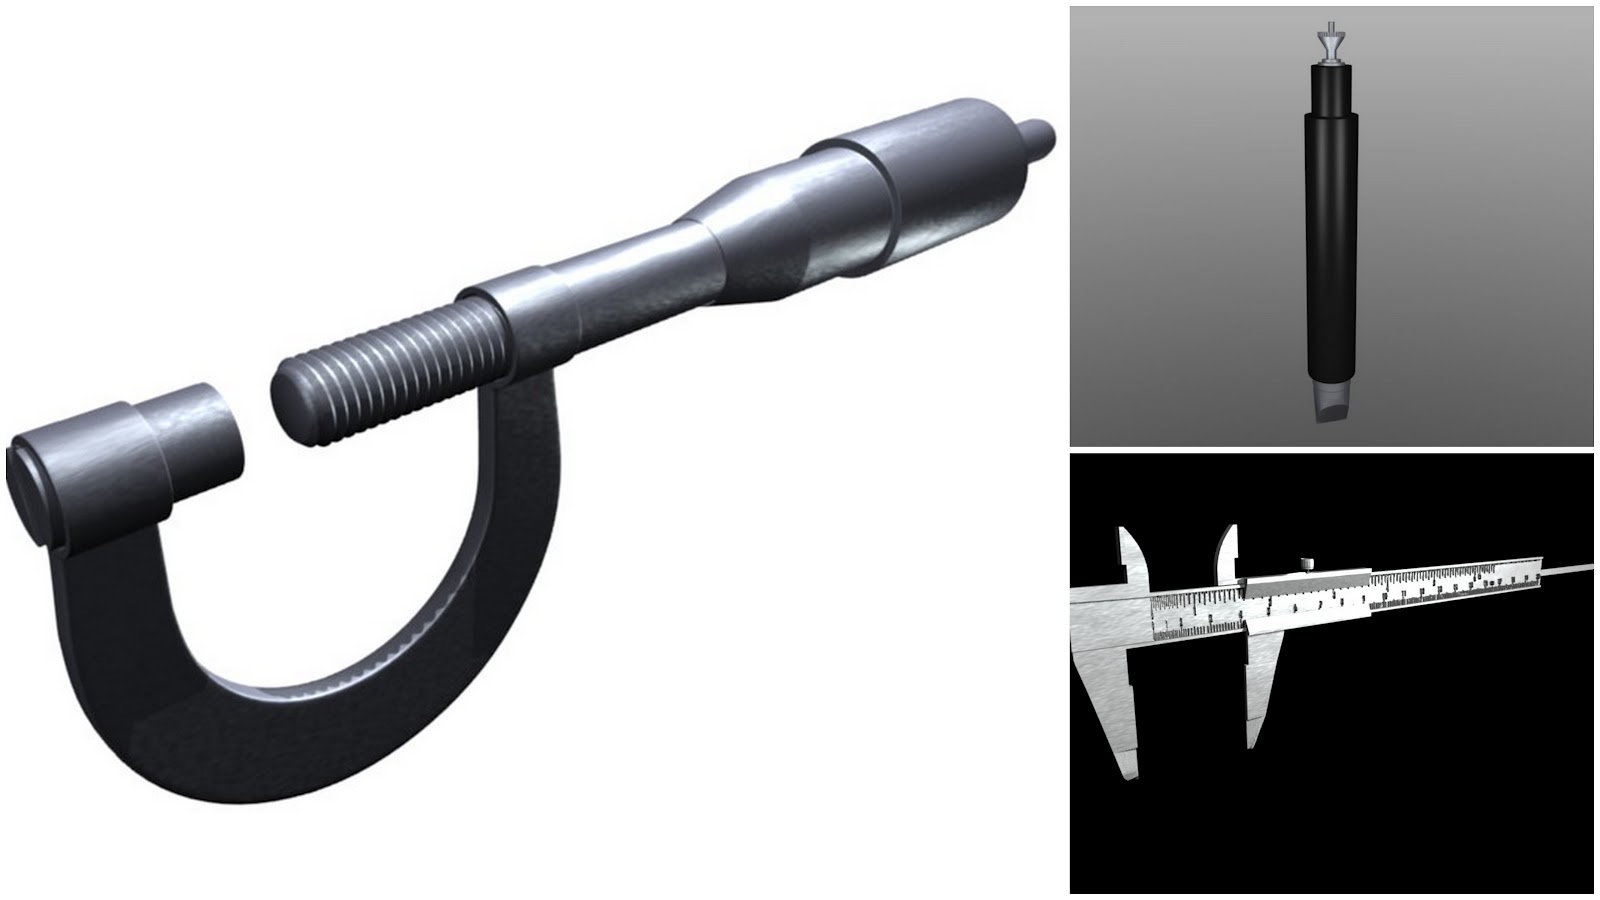
Vernier Caliper: The vernier, dial, and digital calipers give a direct reading of the
distance measured to high accuracy. They are functionally identical,
with different ways of reading the result. These calipers comprise a
calibrated scale with a fixed jaw, and another jaw, with a pointer, that
slides along the scale. The distance between the jaws is then read in
different ways for the three types.
Here are the initial renders in Blender 2.49:
In addition to my previous models for Physics, these are few more. Following are the existing models on the OSCAR website, whereas, just below them, is an images showing renders of the same models in Cycles:
Screw gauge: It is a device, sometimes known as a micrometer, incorporating a calibrated screw used widely for precise measurement of small distances in mechanical engineering and machining as well as most mechanical trades, along with other metrological instruments such as dial, vernier, and digital calipers.
Jockey: It locates the Null point deflection after taping and is a device that has almost zero resistance.
Here are the initial renders in Blender 2.49:
![]() |
| Screw Gauge, Jockey and Vernier Caliper (Blender Render) |
Here are the renders in Cycles render Engine:
![]() |
| Jockey, Vernier Caliper and Screw Gauge (Cycles Render) |
Jockey, rendered with Cycles has two materials, a black one, which has a Mix shader, with Diffuse and Glossy, as the shades and the other one is metallic, steel, which again uses the glossy material. My Colleague, Pankaja helped me with the metal texture.
Screw Gauge, rendered with Cycles has four materials, three shades of Grey, with glossy materials and varying roughness and the last one for the UV mapping purpose, to display the scale on the surface of the model. Two of my colleagues, Bhavya and Nitin, helped me out with the UV texture.
Following are the settings for the metallic material:
Potetiometer and Scale texture in Cycles
Hello Everyone,
Potentiometer is an instrument used in physics experiments to determine the potential difference of an instruments.
Metallic textures are easy enough to do with using mix shadder with difuse and glossy shader.
The real problem comes in Measuring Scale while doing scale markings.Potentiometer is an instrument used in physics experiments to determine the potential difference of an instruments.
![]() |
| Screw Details |
![]() |
| Measuring Scale |
![]() |
| Final Render in Cycles 300 Sample |
![]() |
| Originally done Blender 2.4 |
Metallic textures are easy enough to do with using mix shadder with difuse and glossy shader.
Generally after getting glass right any material should sound easy enough to do, but my team mates would say differently, after glass there is UV mapping.
So UV mapping in this one I would say was quite different from the others which I had done so far.
Unwrap process in simple enough to select the upper face of the measuring scale and select unwrap option.
The problem begins after you unwrap and apply image texture. For scale marking we need a good transparent image texture in .png format and alpha mapping should do the trick right? wrong...
For this texture to make happen I tried all the possible mapping technique I knew alpha mapping, tried all the forms of unwrapping, cube projection etc.
Like Glass Jar earlier where problem was with mesh rather than material, but in this mesh was as simple as it can be a CUBE!.
I could only see scale marking as the mixture of both scale texture and wood material, depending upon the factor value in mix shader, and after using invert node i got the scale marking in white color rather than black.
![]() |
| Node setup and aftter invert node. |
But with new texture the problem was in render it didn't show any texture.
![]() |
| Add caption |
But than alpha mapping did the trick.. I connected alpha of the image texture to invert node and output of invert node to factor value of mix shader and finally it is done.
![]() |
| The Final Node setup. |
Burner with fire effect
I have add a new mesh object to create a new particle system for it to be used as a smoke flow. To emit fire, you can always use a typical "No physics" particle system. It allows fire to have some random initial velocity causing some cool turbulence and random movement.
Particle System and Domain settings:
In Particle system i have taken 10000 number of particles and particle display is point. I have use cube as a domain object and division 40. I have also use the Smoke High Resolution option for realistic effect. Also note when simulating fire that domain resolution changes fire behavior and looks. I used 2 resolution divisions for final render, but you should run some test simulations before even enabling high resolution. This way you don't have to use so much time in resimulating if some values are messed up.
Smoke in Particles:
Now create the smoke "Flow" using this particle system. As for the settings: I have used "Temp. Diff" to 1.0 to get faster rising fire. You can lift it even higher if you want it to rise even faster, lower it if you want "slow motion". This also depends on how large fire are you making.
Material settings for Domain :
Next the settings of the two Voxel Data textures used to create the fire effect from the Blender smoke simulation. The first one has the usual settings to set the density of the volume material accourding to the voxel data of the simulation. The second one has the most important part of the setup - the color ramp that multiplies on the emission color. Notice it's got completely transparent parts on both ends and no part is fully opaque. After baking particles you can see the final render output in video.
![]() |
![]() |
Wednesday, July 18, 2012
Glass Jar in Cycles. (Re do)
Hello,
Glass Jar which was earlier done by Sneha Deorukhkar, credits goes to her for the good material work and lighting.
But while she finished with glass jar the base part of the object didn't look good.
I thought it might be the reflection of the world color I tried changing it but no change in the output.
I tried some unusual setup in nodes but those experiment didn't work either.
Finally I gave up and posted thread on blenderartist.org forum.
No reply for 2 days.
Some people suggested disable caustic option in render and it changed the output a bit but it didn't solve the problem either.
The real problem was actually with mesh of the base part.
Still working in Blender for so long I forgot about triangular mashes.
I edited the base part removed the triangular faces as much as I could and minimize them as possibly as I can.
And this did the trick.
The next render was a clear than what I had thought for.
And after referring some of the threads in blenderartist.org about cycles and rendering setting that was it.
In materials I have used mix shader with Transparent and glass shader the factor is 1.
The render settings which I did to get clear transparent glass without the black smudges at the edges is you can see in the screen shot above.
Increase the value of Max Bounce and Transparency Max.
The minimum value for glass is 150.
Increase the light paths value also.
The credit goes to Sneha Deorukhkar for earlier glass material and light setup. Glass material is one of the hardest to get so far.
And not to mention the render time the final render took 1 hour 21 minute.
Glass Jar which was earlier done by Sneha Deorukhkar, credits goes to her for the good material work and lighting.
![]() |
| Earlier Render |
But while she finished with glass jar the base part of the object didn't look good.
I thought it might be the reflection of the world color I tried changing it but no change in the output.
I tried some unusual setup in nodes but those experiment didn't work either.
Finally I gave up and posted thread on blenderartist.org forum.
No reply for 2 days.
Some people suggested disable caustic option in render and it changed the output a bit but it didn't solve the problem either.
The real problem was actually with mesh of the base part.
Still working in Blender for so long I forgot about triangular mashes.
I edited the base part removed the triangular faces as much as I could and minimize them as possibly as I can.
And this did the trick.
The next render was a clear than what I had thought for.
And after referring some of the threads in blenderartist.org about cycles and rendering setting that was it.
![]() |
| 500 Samples |
![]() |
| Final Render |
In materials I have used mix shader with Transparent and glass shader the factor is 1.
The render settings which I did to get clear transparent glass without the black smudges at the edges is you can see in the screen shot above.
Increase the value of Max Bounce and Transparency Max.
The minimum value for glass is 150.
Increase the light paths value also.
The credit goes to Sneha Deorukhkar for earlier glass material and light setup. Glass material is one of the hardest to get so far.
And not to mention the render time the final render took 1 hour 21 minute.
Distillation Column
MHRD Learning Objects Developed by IRCC IIT Bombay 2011
Project: OSCAR
Content: 3D animation using Blender 3D 2.56 Beta,
Simulation
Voltmeter & One way key
VOLTMETER :
In above image, Diffuse BSDF is used & the scale is applied as image texture. In this red terminal, add Diffuse BSDF & give R=0.168, G=0.01014 & B=0.000
The one way key's material is same as tap key. I have put mix shaders to get the result of Black plastic material of key. One is Glossy BSDF & other is Diffuse BSDF with roughness as 2.000 & 0.000 respectively.
Voltmeter
Black plastic material values are given below:
In above image, Diffuse BSDF is used & the scale is applied as image texture. In this red terminal, add Diffuse BSDF & give R=0.168, G=0.01014 & B=0.000
One way key:
Subscribe to:
Posts (Atom)